

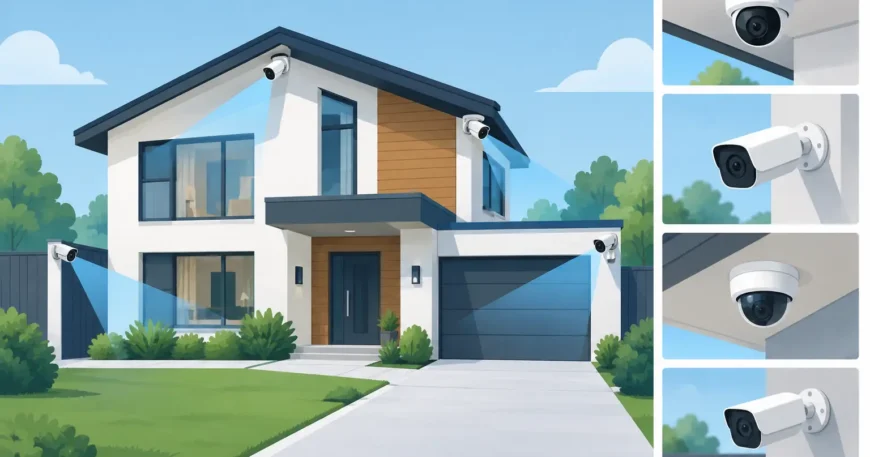
A camera system can look complete on a quote and still miss the moment that matters. A driveway camera aimed too wide may not identify a face. A warehouse camera mounted too high may show activity without showing what happened. These best security camera placement tips focus on useful coverage, clear identification and an installation that suits how your property actually operates.
Start with the risks, not the camera count
The right number of cameras depends on access points, sightlines, lighting and the value of what you need to protect. Starting with a fixed number of cameras often creates blind spots at gates, rear doors, loading areas or shared corridors. Start instead by walking the site and asking three practical questions: where can someone enter, where do people or vehicles move, and where would evidence need to be clear?
For a home, that usually means the front entry, driveway, side access, rear doors and any detached garage or shed. For an office, retail site or warehouse, include staff entrances, reception, stock areas, loading docks, car parks, server rooms and external plant areas. Apartment and multi-dwelling properties need careful attention around building entrances, mail areas, lifts, car parks, corridors and rubbish rooms.
A camera is most valuable when it records a decision point. Place coverage where a person chooses to enter, leave, collect a delivery, access a restricted room or approach a vehicle. Wide overview views are useful, but they should not replace cameras positioned to capture faces, number plates or hand movements at critical points.
Best security camera placement tips for each zone
Cover entries with an identification view
Mount cameras near front doors, rear doors, gates and staff access points so they look towards approaching people rather than down at the top of their heads. A camera placed directly above a door often records a cap, hair and shoulders. Moving it slightly to one side at an appropriate height can give a much clearer view of the face.
Avoid setting the camera too far back unless the lens and resolution are designed for identification at that distance. A wide angle image can cover an entire verandah or foyer, but faces may appear too small to be useful. In many cases, a dedicated entry camera paired with a wider overview camera produces better results than one camera trying to do both jobs.
For commercial sites, consider access-control readers, intercoms and doors together. The camera should capture the person using the door, not only the door itself. This makes incidents, delivery disputes and after-hours access easier to review.
Treat driveways, car parks and loading areas as separate tasks
Driveways and car parks need coverage for people and vehicles, but those are not always the same view. An overview camera can show vehicle movement and parking activity. A narrower, carefully positioned camera may be needed to capture a number plate at a gate, boom barrier or slower point of travel.
Do not aim a number-plate camera at a fast-moving vehicle from a steep angle and expect consistent results. Headlights, distance, rain and speed can reduce image quality. A practical design places the camera where vehicles naturally slow down or stop, with suitable lighting and a controlled angle.
At warehouses and commercial premises, cover loading docks from more than one perspective where possible. One camera should show the dock activity, while another can cover the goods, roller door or vehicle approach. This helps establish a clear sequence if there is damage, a missing delivery or a safety incident.
Protect side paths and rear access without creating blind zones
Side access is frequently overlooked because it is narrow, dark and out of sight from the street. It is also a common route to rear doors, utility equipment and ground-floor windows. Position a camera at either end of a long side passage, or use a suitable wide-angle view that covers the full length without leaving a hidden section close to the wall.
Rear yards, fenced compounds and service areas need the same thought. Aim cameras across the space, not directly into the sun or towards reflective surfaces. A camera facing a bright morning or afternoon sky can produce washed-out images at precisely the time someone is approaching the property.
Put indoor cameras where the event becomes meaningful
Indoor surveillance does not need to cover every room. In homes, focus on main entry areas, valuables storage, internal access from garages and areas where pets, carers or deliveries may need monitoring. Cameras should never be placed in bathrooms, bedrooms or other spaces where people reasonably expect privacy.
In offices and warehouses, prioritise reception, stock exits, cash-handling points, restricted rooms, server areas and the routes between them. A camera at the entrance to a stockroom is often more useful than a camera deep inside it, because it records who entered and left. If stock is stored in several zones, consider both an overview of the area and clear coverage of the access path.
Height, angle and lighting make or break the image
Mounting cameras high enough to discourage tampering is sensible, but excessive height reduces the chance of useful identification. The best mounting height varies with the camera type and target area. As a general rule, install it high enough to protect the equipment while keeping faces within the camera’s effective field of view.
Before finalising placement, review the image at the time conditions will be most difficult. Test at night, during bright daylight and with exterior lights switched on. Infrared night vision is useful, but it can be affected by nearby walls, eaves, glass and reflective signs. A camera behind a window may work in daylight but produce glare or infrared reflection after dark.
Good lighting is often a better investment than simply adding more cameras. Entry lights, car park lighting and illuminated access paths improve footage quality and make the property safer for staff, visitors and residents. Avoid pointing cameras directly at bright floodlights or vehicle headlights where possible.
Plan cabling and network capacity before installation
Wireless cameras have a place, particularly where cabling is difficult, but they still rely on stable Wi-Fi coverage, power and adequate network capacity. A camera at the edge of a large warehouse, detached garage or multi-storey property may have an unreliable connection just when it is needed most.
For permanent installations, wired IP cameras with structured cabling and Power over Ethernet are usually the more dependable option. One properly installed cable can provide both network connectivity and power, reducing the need for local power points and avoiding frequent battery maintenance. It also supports a cleaner, more scalable installation as the system grows.
Recorders, network switches and storage should be sized for the number of cameras, resolution, frame rate and retention period required. High-resolution footage is valuable, but it consumes more storage and network bandwidth. A practical system uses the right resolution for each task rather than setting every camera to maximum quality without considering cost or retention needs.
Avoid common placement mistakes
The following problems regularly reduce the value of otherwise capable camera systems:
- Installing one wide camera where an entry, vehicle lane and rear access each need dedicated coverage.
- Aiming cameras into direct sunlight, headlights, glass or highly reflective surfaces.
- Mounting equipment so high that faces, labels and number plates cannot be identified.
- Relying on weak Wi-Fi signals for cameras in outbuildings, car parks or distant warehouse areas.
- Forgetting to check night footage before the installation is signed off.
- Recording shared or public-facing areas without considering privacy obligations, signage and local requirements.
Privacy should be part of the plan from the beginning. Keep cameras focused on your property and legitimate security areas. For apartments, offices and managed properties, clear policy, sensible signage and controlled access to recordings help protect residents, staff and the organisation.
Use a site survey to make every camera count
A professional site survey turns a general security wish list into a workable plan. It considers building layout, cabling routes, mounting surfaces, lighting, internet connection, recording equipment and future expansion. It also identifies practical issues early, such as concrete walls, long cable runs, poor Wi-Fi areas and locations where a camera would be difficult to service.
Georgia Technical Services can design and install CCTV and IP video systems alongside the structured cabling and network infrastructure that keeps them reliable. That single-source approach is especially useful for office fit-outs, warehouses, homes and multi-dwelling upgrades where cameras need to work properly with the wider network.
The best placement is rarely the most obvious wall or the highest corner. Walk the property, follow the routes people and vehicles actually use, then test the view before the system is finalised. A small adjustment in angle, height or lighting can be the difference between footage that merely shows an incident and footage that helps resolve it.
