

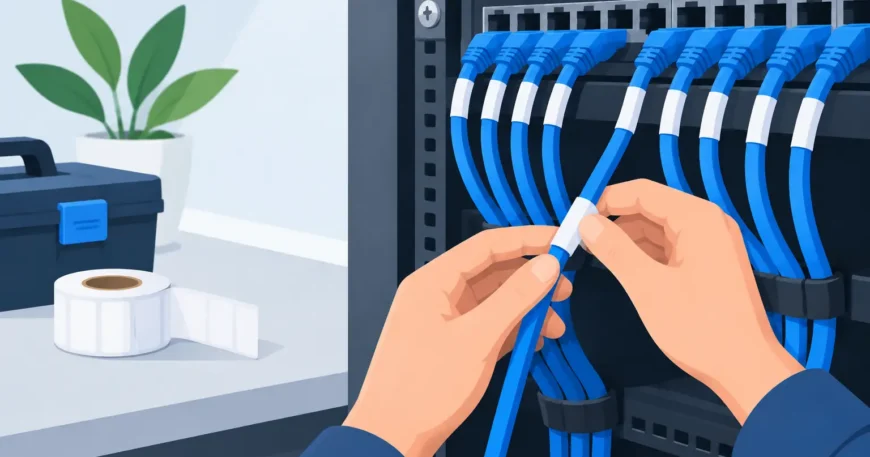
A network can look perfectly installed until one internet drop fails, a switch needs replacing, or a tenant moves out. That is when unclear cabling turns a quick job into hours of tracing leads through a cabinet, ceiling space or comms room. Knowing how to label network cables gives every cable a clear purpose, location and destination – making future repairs, moves and upgrades faster and less disruptive.
For a home office, a simple label may be enough. For an office, warehouse, apartment building or high-rise retrofit, the labelling system needs to work for years and still make sense to the next technician. The goal is not to add labels everywhere. It is to create a consistent record that lets someone identify any cable without guesswork.
Start with a naming system before pulling labels
The best time to plan cable labels is before installation. Retrofitting labels is still worthwhile, but it takes more tracing and testing. Decide what each identifier needs to tell you: the building or site, floor, room or unit, outlet number, rack or cabinet, and port where relevant.
A practical office format might look like `B1-L2-204-D03`. This could mean Building 1, Level 2, Room 204, data outlet 3. In an apartment property, `A-1206-D02` could identify tower A, unit 1206, second data outlet. The exact code is less important than using the same structure everywhere.
Keep identifiers short enough to fit cleanly on a cable label, but specific enough that a technician can find the outlet. Avoid vague names such as “conference room cable” or “front desk”. Rooms get renamed, furniture moves and businesses change layout. A room number or fixed outlet ID is far more reliable.
For larger properties, assign separate prefixes for different systems. For example, use `D` for data, `V` for voice, `C` for CCTV, `AP` for wireless access points and `AV` for audio-visual runs. This helps when multiple low-voltage systems share the same rack, tray or ceiling pathway.
How to label network cables at both ends
Every permanent cable should carry the same identifier at each end. One label goes near the patch-panel termination, and the matching label goes near the wall plate, device outlet or equipment connection. If either end is missing, fault-finding becomes slower than it needs to be.
On structured Cat5e, Cat6 or fibre installations, label the horizontal cable and the faceplate or module. Then label the corresponding patch-panel port. The patch lead itself can also be labelled where it connects critical equipment, particularly servers, uplinks, firewalls, cameras and wireless access points.
Place labels where they can be read without disconnecting the cable. At a patch panel, position them just behind the termination point or on the cable management section, rather than buried inside a bundle. At a wall outlet, the outlet label should be visible on the faceplate, with the cable label accessible above the ceiling or in the back box where practical.
Do not rely on cable colour as the main identifier. Colour can help distinguish services – such as blue for data, yellow for fibre or red for critical links – but colour alone is not documentation. Stock availability, later additions and previous installers can make a colour-only system unreliable.
Choose labels that suit the environment
Handwritten masking tape may help during a short installation, but it is not a permanent solution. It fades, peels, collects dust and often leaves behind a mystery when someone has written “test” on five different cables.
For most residential and commercial data cabling, self-laminating wrap-around labels or heat-shrink labels are the practical choice. A self-laminating label wraps around the cable and protects the printed text under a clear layer. Heat-shrink labels are neat and durable, but they must be fitted before termination, so they are less convenient for existing cables.
Use a thermal label printer rather than handwritten labels for permanent work. Printed labels are easier to read, more consistent and less likely to smudge in a warm ceiling space or busy communications cabinet. Select labels rated for the expected conditions, especially in warehouses, plant rooms, outdoor enclosures or areas exposed to dust, moisture or heat.
For fibre, use labels designed for smaller cable diameters and avoid placing them where they could interfere with bend radius or strain relief. Fibre links should be identified clearly at the panel, enclosure and equipment end because incorrect patching can affect multiple services.
Label the pathway, not just the cable
A well-labelled cable is useful. A well-labelled installation is better. In larger systems, label the patch panels, racks, cabinets, trays and conduits as well. This is especially valuable where cables run between floors, buildings or telecommunications rooms.
For example, a cabinet label such as `MDF-01` identifies the main distribution frame, while `IDF-L3-01` identifies an intermediate cabinet on level 3. A cable record can then show that outlet `B1-L2-204-D03` terminates on `IDF-L2-01`, patch panel 2, port 18.
This approach prevents a common problem in offices and multi-dwelling buildings: technicians know where an outlet is, but not which closet, panel or pathway serves it. Clear infrastructure labels reduce the need to tone out every cable when changes are required.
Build a cable schedule that matches the labels
Labels identify cables in the field. A cable schedule explains the full installation. It can be a spreadsheet, network documentation platform or property records file, provided it is kept current and available to the people responsible for the site.
Each record should include the cable ID, origin, destination, cable type, panel and port, service or VLAN where relevant, test result, installation date and notes. For critical links, include the connected equipment and any redundancy details. A simple schedule makes it much easier to plan a switch replacement, add a desk, relocate a camera or investigate a dead outlet.
For a small home, the record may simply list each room outlet and the associated patch-panel port. For a warehouse or apartment complex, documentation should also capture building zones, risers, fibre backbone links and unit allocations. The scale changes, but the principle stays the same: the label in front of you must match the record on file.
Update the schedule whenever a cable is added, removed, re-terminated or reassigned. This is where many otherwise good systems fail. A labelled cable that has been moved to another switch port without updating the records can send troubleshooting in the wrong direction.
Use a repeatable labelling process
For new work, label cables before they disappear into conduits, walls or cable trays. Confirm the outlet ID, apply a temporary pull label if needed, install and terminate the cable, then apply permanent labels at both ends. Test the run and record the result before closing ceilings or handing over the work.
For existing cabling with poor or missing labels, work methodically. Identify one cable at a time with a cable tester or toner and probe, confirm both endpoints, apply the permanent ID and update the schedule immediately. Trying to identify an entire cabinet from memory creates errors, particularly where old data, telephone and security cabling are mixed together.
Critical services deserve an extra check. Label uplinks between switches, internet hand-off connections, firewall ports, access points, CCTV network links and server connections so they are obvious before anyone unplugs them. It is also sensible to mark spare ports and unused cables accurately rather than calling everything “spare”. A spare cable with a known destination is valuable; an unknown cable is not.
Avoid the shortcuts that create future faults
The most common labelling mistake is using inconsistent formats. If one installer writes `Office 2`, another uses `O2` and a third uses `Room Two`, the system is already difficult to manage. Agree on the format, publish it and apply it to every new run.
Another issue is labelling only the patch panel. This may be acceptable for a very small setup, but it does not help when the cable is found above a ceiling, behind a display, at a camera or in another communications room. Matching labels at both ends are the minimum standard for maintainable work.
Do not wrap labels so tightly that they damage cable jackets, and do not cover manufacturer markings needed for cable ratings or certification. Keep labels away from connectors, latches and points where frequent movement may cause them to lift. In high-density racks, good cable management is just as important as the label itself.
When professional labelling makes sense
A homeowner can label a few Ethernet runs with a basic printer and a clear plan. Larger installations benefit from professional structured cabling work, particularly when there are multiple racks, fibre links, security systems, tenant units or a mix of new and legacy wiring.
Georgia Technical Services can design, install, test and document structured cabling so the labels, patch panels, outlets and records all align from day one. That is particularly useful for offices, warehouses and multi-dwelling properties where a poorly documented network can add unnecessary cost every time a tenant, device or service changes.
A cable label is a small detail, but it protects the value of the whole installation. Give every run a clear identity now, and the next repair or upgrade becomes a planned task rather than a search through a cabinet full of unknown cables.
