

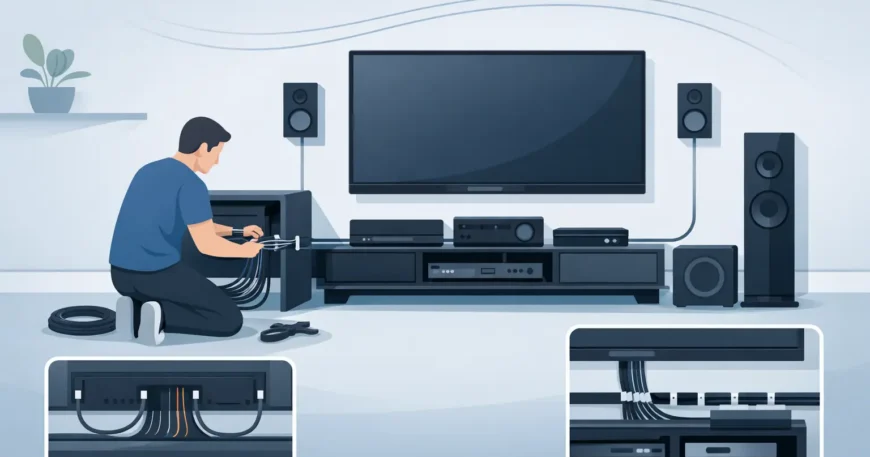
A great screen and quality speakers can still disappoint when the cabling is an afterthought. Home theatre wiring installation determines where equipment can sit, whether sound reaches every speaker cleanly, how reliable streaming remains at peak use, and whether the finished room looks considered rather than cluttered with visible leads.
For homeowners, builders and property managers, the goal is not simply to get a picture on the television. It is to create a dependable low-voltage foundation that suits the room now and leaves sensible options for future equipment. That means planning cable routes, power locations, network access, ventilation and control before walls are closed or cabinets are installed.
Start home theatre wiring installation with the room
Every room has different constraints. A dedicated media room may allow in-wall speakers, an AV rack and projector cabling, while a living room may need a more discreet approach that works around windows, furniture and existing finishes. The wiring plan should follow how the space will actually be used, not just where the television happens to fit.
First, establish the display location and seating position. These decisions affect speaker placement, viewing height, projector throw distance and where cables need to terminate. A wall-mounted television often needs a recessed cable path to a nearby cabinet or equipment location. A projector may need cabling through the ceiling to a central mount, plus a suitable route for network and control connections.
Equipment placement matters just as much. Putting the receiver, amplifier, streaming device and network equipment in one accessible location makes servicing easier and keeps the room tidy. However, that location needs airflow. AV receivers and amplifiers produce substantial heat, especially during long viewing sessions. A closed cabinet with no ventilation can shorten equipment life and cause performance problems that look like an audio or network fault.
Choose cabling for performance and flexibility
Home theatre systems typically use several cable types. The right combination depends on the display, speaker layout, equipment distance and whether the system is designed for future upgrades.
Speaker cable runs from the amplifier or receiver to each speaker position. Cable should be correctly rated for in-wall use where required, sized for the length of the run, and clearly labelled at both ends. Leaving a small amount of service slack at accessible points can make future termination or equipment changes far less disruptive.
HDMI carries high-definition video and audio between devices, but it is not always the best choice for every distance. Short, accessible runs are straightforward. Longer concealed runs can be less forgiving, particularly when supporting 4K, high refresh rates or newer source equipment. In those situations, a quality active HDMI solution or a properly designed video extension system may be the better option. Running conduit is also valuable because it provides a path to replace or add a cable later without opening the wall.
Cat6 data cabling is one of the most useful inclusions in a theatre room. Streaming services, game consoles, smart televisions, control systems and media servers all benefit from a wired Ethernet connection. Wi-Fi can work well, but it is shared with other devices and affected by distance, building materials and local interference. A hardwired network connection provides more consistent performance where buffering, drop-outs and gaming latency are not acceptable.
It is often worthwhile to install more than one data point. One can serve the television or streaming device, while another supports a game console, control processor, wireless access point or future hardware. The cost of adding a second Cat6 run during a new build or renovation is usually modest compared with opening finished walls later.
Plan the speaker layout before cabling begins
Speaker wiring must match the intended audio design. A basic soundbar has very different requirements from a 5.1, 7.1 or Dolby Atmos system. The numbers refer to main and surround speaker channels, followed by subwoofers where applicable. Atmos systems add height channels, often placed in or on the ceiling.
Do not place speakers solely where cable access is easiest. Front speakers should support clear dialogue and a balanced soundstage around the screen. Surround speakers need to sit in positions that create immersion without being blocked by furniture. Ceiling speakers must be placed with attention to ceiling joists, insulation, light fittings and access above the ceiling.
Subwoofers are a practical exception. Many are powered and connect to the receiver using a low-level signal cable, but their final position may change after the room is tuned. Providing an accessible pathway or spare cable route gives more freedom to test placement. Bass response is heavily affected by room shape and furnishings, so the most convenient position is not always the best-sounding one.
For a multi-room setup, separate zones should be planned from the start. You may want the theatre audio isolated from outdoor speakers, a living area or a patio. That requires the right amplifier capacity, speaker cabling and control arrangement. It is easier to provide a clean pathway while walls and ceilings are accessible than to retrofit it after the fact.
Keep power and low-voltage cabling properly organised
Low-voltage cabling for data, speakers, video and control should be planned alongside electrical work, not treated as the same installation. Mains power must be handled by a suitably licensed electrical professional. Separating power from low-voltage pathways helps reduce interference and makes the installation safer, neater and easier to troubleshoot.
The number and position of power points deserve careful attention. A television wall may need power behind the display and additional outlets at the equipment cabinet. Projectors need power at the ceiling position. Active subwoofers, network switches and wireless access points may also need nearby power. Extension leads tucked behind cabinetry are not a long-term solution for a system that is meant to be reliable.
A structured wiring approach keeps everything easier to manage. Cables should be supported correctly, protected where they pass through framing, and terminated at labelled wall plates, patch panels or equipment racks. Labels might seem minor on installation day, but they save time when a television is replaced, a receiver is upgraded or a technician needs to identify a fault years later.
Allow for control, security and connected devices
Modern theatres are connected rooms. The same network that supports entertainment may also support smart lighting, motorised blinds, video doorbells, CCTV cameras and voice or app-based controls. These systems can work together well, but only if the network has been designed with enough capacity, coverage and physical connections.
A central network location with a quality switch and organised patching can support the theatre as well as the wider home. If equipment is stored in a cabinet, consider whether infrared control, IP control or a dedicated control system is required. Closed cabinetry can block remote signals, while network-based control can provide more reliable operation from a phone, tablet or wall keypad.
This is also where professional planning prevents avoidable compromises. A single cable may not support every possible future requirement, and not every room needs an expensive control system. The right solution depends on the equipment, budget, building access and how much automation the household genuinely wants to use.
Why concealed cable work should be planned early
The best time for concealed home theatre wiring is during construction, renovation or before cabinetry and wall linings are complete. Routes can be installed cleanly, wall plate positions can be confirmed at the right height, and spare conduit can be included with minimal disruption.
Retrofitting is still possible in many homes, but it requires careful assessment. Existing wall cavities, concrete construction, insulation, heritage finishes and inaccessible roof spaces can affect the method and cost. A professional installer should inspect the site, explain realistic cable routes and avoid promising a completely invisible finish where the building structure does not permit it.
Georgia Technical Services provides practical low-voltage installation support for theatre rooms, network cabling and connected home systems. The focus is on tidy cable routing, correctly terminated connections and an installation that remains serviceable when your equipment changes.
Before selecting screens, speakers or receiver models, map the infrastructure behind them. A well-planned wiring job gives you a cleaner room, dependable entertainment and the freedom to upgrade without turning a finished wall into a repair project.

